Pages

Friday, September 30, 2011

Taco Soup


     My mom makes the absolute best chili, the best lima beans and sausage, the best red beans and rice, the best turnip green soup, and the best taco soup. Believe me, she knows how to whip up a big pot of deliciousness. I plan on sharing all five of these amazing recipes with you, and there is no better day to start than today. The first one I am going to share is my mom's taco soup recipe. It is hearty, comforting, and so perfect for colder weather. Here is what you will need:
2 pounds ground beef
1 medium onion, diced
1 14 oz. can of corn
1 14 oz. can black beans
1 14 oz. can navy beans
1 28 oz can crushed tomatoes
1 can ROTEL
1 packet of Ranch dressing mix
2 packets of taco seasoning
2 cups water

(I need to mention that I did alter the recipe slightly. My mom's original recipe calls for pinto beans, kidney beans, and black beans but I just used what I had on hand. Also her recipe calls for shoe-peg corn, but again, I just used what I had. And finally, because I did not use as many beans I decreased the amount of taco seasoning packs from 3 to 2. My mom won't mind one bit that I changed her recipe-- she is ALL about "a little of this, and a little of that." Love you mom!)

In a large pot brown the meat with the onions.

While the meat is browning open all of the cans. Be careful not to cut yourself! I've done that before on a can lid and IT HURT!

Drain and rinse the corn and beans.

When the hamburger meat is brown and completely cooked through, use a fine mesh strainer and drain off the fat. I used the cheap ground beef this time (you know, the kind you buy in the huge log) so I rinsed my meat with hot water to get all of the grease off-- the log o' beef is extra greasy.

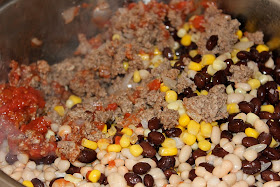
Return the hamburger meat to the pot and add in the beans, corn, tomatoes, ROTEL...

ranch packet, taco seasoning packets...

and 2 cups of water. I pour the water into the crushed tomato can to get any extra tomato bits out of the can, and then pour it into the pot.

 Stir to combine and let simmer for 1-2 hours. Or you could pour this into the crockpot and let it cook on low for 6-8 hours. The best thing about this soup is that it just gets better and better the longer it sits.

Serve this soup with a generous sprinkling of shredded cheese, a dollop of sour cream, and Frito corn chips.
Here is me and Adam about to dig in! This was a great night :) just the two of us, snuggled up on the couch, watching a movie, and eating taco soup... Adam's bowl is on the left. He really likes sour cream. And cheese. And taco soup. And me!

You should try this soup. It is SO easy and SO delicious! Thank God for momma's like mine that can cook!
 I'm thinking about my momma more than normal today because she just had shoulder surgery and I am praying she feels better soon!

Thanks for reading! Call your momma and tell her you love her today. Love y'all!

Thursday, September 29, 2011

Baking Product Preferences

     If you read my recipe posts often you will get an idea of what I use to bake. Some of the things I use now are a result of what the grocery stores around here carry. It also has to do with the fact my husband is in medical school and I choose to save fifty cents by buying the off-brand cream cheese. Here is a list of brands or products I would use 100% of the time if I lived close to a Publix and had a money tree.

Philadelphia Cream Cheese*
White Lily Flour*
Wesson Vegetable Oil
Mexican Vanilla*
Crisco Non-stick Spray
Domino Sugar
Domino Confectioner's Sugar*
Nestle Semi Sweet Chocolate Chips
Horizon Organic Milk
Eggland's Best Grade A Organic, Cage-Free, Grain Fed hen, Brown Eggs
Dairy Fresh Buttermilk
Dairy Fresh Ice Cream*
Land O' Lakes Unsalted Butter
Libby Pumpkin
Hershey's Unsweetened Cocoa Powder*
Eagle Brand Sweetened Condensed Milk

*These items are ones I usually splurge and buy or find a coupon for because I can really tell a big difference when I don't use them.

Yeast Bread, Part 2; Cinnamon Rolls

   As promised yesterday, I am about to show you how I made this lovely bundle of sweetness. Otherwise known as a cinnamon roll. 


     So where did we leave off yesterday? Oh yeah, the dough has been made and it has risen once. Now to make the cinnamon sugar filling for the cinnamon rolls! Once again, it is composed of the usual culprits: sugar, cinnamon, and butter.
And because I am my mother's child I threw in a dash of nutmeg and allspice.


Mix well... and try not to eat it all.

Retrieve the dough and turn out onto a floured surface.


Shape the dough into a rectangle with your hands.

Then, using the rolling pin, roll the dough into a rectangle. The dimensions of my rectangle were 24X16.


Pour the cinnamon sugar mix onto the dough and spread evenly over the entire surface.


Now it's time to start rolling! "Rolling!"

"Rolling!"

"Rolling on the river!"

It should make a nice smooth dough "log" like this one.

Grab a serrated knife...

and start cutting the rolls.

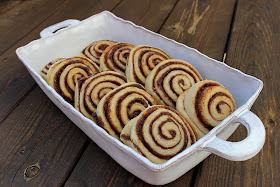
They are actually starting to look like cinnamon rolls now!

Arrange the rolls in greased pans.

And as if they weren't special enough...

brush them with more butter before letting them rise a second time.

This is after the second rise and just before they went in the oven! Bake until golden brown and irresistible.

Yeah. Just like this. Mmmmm.

Oh baby.


I have fond memories of Sunday and Saturday mornings with my family eating cinnamon rolls. Most of the time we ate the ones out of the can. My brothers and I would fight over who got the "empty" icing container. You know-- the white plastic cup with the silver lid. We would lick it until our tongue hurt. Those are some great memories. I also remember special times when my mom made cinnamon rolls from scratch. It was such a labor of love because she had to wake up so much earlier than us to have them ready by breakfast time. We would wake up to the heavenly smell of cinnamon rolls coming out of the oven. Fresh, piping hot. I have such a sweet momma :)


Wait one cotton-picking minute! These rolls are missing something!


That's much better :)

This cream cheese icing is the perfect compliment to these cinnamon rolls. Just beat together 2 ounces of softened cream cheese, a heaping tablespoon of softened butter, 1/8 teaspoon of lemon juice, 1 teaspoon of vanilla, 1 tablespoon of milk, and 3/4 cup powdered sugar.


Look at it's cute little brown bottom!

Don't mind if I do!

Thanks for reading on this beautiful Thursday! I hope it is beautiful where you are :) love y'all!

Wednesday, September 28, 2011

Yeast Bread, Part 1; Parker House Style Rolls

     Have you ever heard of Sister Schubert? As in the Sister Schubert's rolls you can buy in the freezer section of your grocery store. Well, if you do not know what I am talking about please do yourself and your loved ones a favor and buy a pan of her rolls to serve with dinner one night. They will change your life. Most of you probably know about her rolls, but did you know she is a real person? I am not kidding! Her face on those packages of rolls is not just another ploy to make a product more personable and marketable. She is real, and I have met her! My mom and I went to a ladies luncheon where she spoke and did a little cooking demonstration. We also bought her cookbook-- and got them autographed by Sister herself! Not only is she one of the nicest, and most down-to-earth people you will ever meet (I mean, hello? She is from Alabama, and women from there are just fabulous!), she is an amazing cook, a woman of God, and has an incredible story. In her cookbook she shares a lot about her family, her life, her company, and her ministry. She also shares her secret to making her famous Parker House Style Yeast Rolls. And as if that isn't enough to make you want to buy the cookbook right this second, her cookbook is filled to the brim with fantastic recipes (more than just bread recipes!) and mouth watering pictures. I thought I outgrew picture books a long time ago but this cookbook changed all that! I would definitely recommend this cookbook. It would make a great Christmas present-- or an "I love myself" present. Here is the link to Sister's cookbook so you can see it for yourself, and purchase it if you like:


     Ever since I got the cookbook I have been itching to make her famous Parker House Style Rolls and her Cinnamon Rolls. However, my experience with yeast bread in the past has been hit or miss so I was a little scared of trying my hand at it this time. But, Sister has a whole section of her cookbook dedicated to technique and tips on making good yeast bread and after I read it I was confident I could do this! So I gathered my ingredients for the rolls and cinnamon rolls and set to work!
     The rolls and cinnamon rolls have the typical ingredients of any other yeast bread: flour, yeast, water, salt, etc. However, because of copyright laws I cannot tell you exactly what went in these. Hey! I don't make the rules. I just follow them! So you can do one of two things: 1) buy Sister's cookbook and you can have the secret to her rolls like me, or 2) go buy a pan of her frozen rolls, heat them up, rub flour on your face/hands/elbows/what-have-you and just tell your family you made them. Sister won't care.

Here is what I did to make make these awesome rolls (the cinnamon rolls will follow in my next post):


Pour your yeast into warm water and allow it to sit for a few minutes.

Whisk together your flour, sugar, and salt.


Melt butter flavored shortening and allow it to cool slightly. You don't want it to be too hot and kill the yeast.

Get ready to combine the flour mixture, water/yeast mixture, and shortening.

Pour them all into a large bowl...

and stir to combine.

Finally add in a little more flour and some eggs...

and stir till incorporated.

Brush the dough with butter...

cover with a damp tea towel...


and allow the dough to rise in a warm place until it has doubled in bulk. I let mine rise in the laundry room while I was washing clothes. The environment was warm, and moist-- which is perfect for yeast dough.
Yep! I'd say that's doubled!

So I told you the cinnamon rolls would come in my next post, right? Well, one of the beautiful things about Sister's cookbook is that she gives you one great recipe (the yeast roll dough recipe) and it can be turned into dozens of different things! (The cookbook gives you tons of fabulous and different recipes, I just mean her famous roll recipe can be used for dozens of different things-- not that she just gives you one recipe. Make sense?) So I chose to use half of this batch of dough for the rolls, and half for the cinnamon rolls. Here is me halving the dough... I'll show you what I did with the other half tomorrow. But for now, on with the rolls!

Generously flour a clean surface...

grab your handy-dandy biscuit cutter-- or in my case a Scooby-Doo cup. Hey-- it works!

Turn your dough out onto the floured surface.

Roll the dough to desired thickness...

and cut out rounds. You'll want to have two 9-inch round pans greased and ready to go.

Take each dough round...

slap some melted butter on it...

fold it in half, and place it in the pan.


All mine are done!

Mmm... butter.

I can already tell I'm going to make myself sick off of these.

Allow them to rise one more time until doubled in bulk.

Bake until golden brown and delicious!

I mean just look how perfect. You can bet I froze this one pan for Thanksgiving! Talk about impressing the family.

But the other pan...

yeah, they didn't last very long.


Stay tuned for tomorrow's post! Cinnamon Rolls! 
Oh yeah... and this other little thing happened in my life recently: I GOT A FANTABULOUS AMAZING FIRST JOB! I am going to dedicate another post just to that so be looking for it, too!

Have a great Wednesday everybody! Love ya!