Tuesday, September 13, 2011

Mrs. Ruth's Fresh Strawberry Dessert


     The weather is beginning to turn very fall-ish where I live! I love fall-- but I love summer too. When I felt the need to put on a jacket the other day while walking the dogs I panicked a little. I have so many summery recipes and so little time left to share them with you this year! I decided to pick one of my favorite summer recipes to share with you before we move on to pumpkin, apple, cinnamon, pecan, brown sugar, and everything else fall. So, here is a recipe to celebrate the end of summer: Fresh Strawberry Dessert. 
     I want to tell you how I came to possess this little nugget of a recipe. There is a lady in my church-- Mrs. Ruth-- THAT CAN COOK! Woo-oo-ee can that woman cook! I am jealous of her skills. She makes this Fresh Strawberry Dessert quite often for church potlucks and such, and every time she brings it there is never any left for her to take home. That pan gets cleaned out! Seriously, people go to the dessert table before the food table to make sure they get a piece of this dessert! It is that good! Well anyways, I was cooking dinner one night for my in-laws (well, then they were technically my "boyfriend's parents") and I really wanted to impress them-- and I knew just the dessert to do it with! I called Mrs. Ruth up and asked if she would give me her recipe. That sweet lady read out all the ingredients and measurement to me over the phone, throwing in a few tips here and there on how she does it. When I hung up the phone I cOUld Not BeLIEve that I--me!-- now had the secret to one of the best desserts on earth! I don't remember what I made for the main course that night, but I certainly remember the rave reviews I got for the dessert! Thanks Mrs. Ruth! (By the way Mrs. Ruth, if you are reading this my daddy told me you made the best chicken and dumplings, macaroni and cheese, and --none other-- than this Fresh Strawberry Dessert for church last Sunday. Wish I could have been there 'cuz nobody makes it like you! Love you!)


Let's get started with this recipe, shall we?
For the full recipe with measurements click here: Fresh Strawberry Dessert*
*I halved the recipe because I was only feeding a small crowd, so you see I'm using a smaller dish than the recipe says to.  Also, if you try to click this link today it may not work. I submitted the recipe on TastyKitchen.com this morning, but there is a review process it has to go through before it is posted publicly. So, if you got a "oops! page not found" message try again tomorrow. Thanks y'all!


For the CRUST you need to:

Preheat the oven to 300 degrees.

Start by melting the butter. To save on dirty dishes, I put the cold butter in the pan I am going to use and throw it in the oven while it is preheating.


Dump in self-rising flour and chopped pecans.
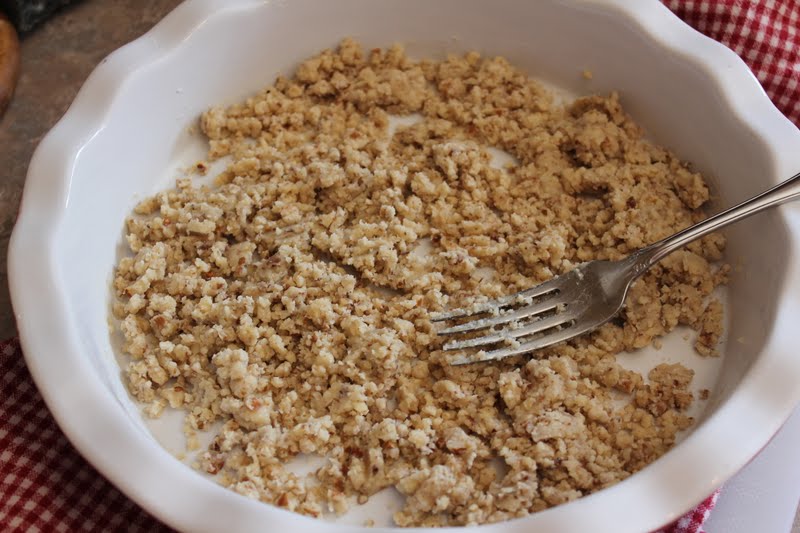
Using a fork mix all three ingredients together until well combined.

Then using your fingers or the back of a spoon, press the crumbly mixture into the bottom of the dish. Bake at 300 degrees for 25 minutes. Remove from the oven and cool completely.


To make the glaze for the TOPPING:
In a medium saucepan combine 7UP, water, sugar, salt, and cornstarch.**
**I have to tell you that this deviates from Mrs. Ruth's original recipe. Mrs. Ruth uses the strawberry glaze you can buy pre-made in the grocery store. I decided to make my own because... Remember how I was telling you that I made this for my in-laws? Well, Adam's dad is allergic to a food preservative called Sodium Benzoate, and what do you know?! It was in the pre-made strawberry glaze. When I read the label and saw that it had it in it I had a major freak-out in the middle of the grocery store. I thought my impressive dessert was over--not happening-- the end. Thank the Lord for smart phones because I googled strawberry glaze and a recipe for it popped up. Whew! My iPhone saved the day. But having said all that, if you don't want to take the time to make your own glaze the pre-made glaze goes perfectly here** 

Continuing the recipe...

Whish together those five ingredients and cook over medium-high heat.

The mixture will turn white and bubbly...

then "clear," thick, and bubbly. Stop cooking it!

Pour in a pack of strawberry JELLO

whisk to combine, and cool completely.


For the FILLING:
~keep in mind that I halved the recipe!~

In a bowl (or large measuring cup, like I did) place your softened cream cheese...

and confectioner's sugar.

Beat with a hand mixer until smooth.

Spoon in the Cool Whip...

fold it in with a rubber spatula until well incorporated. Set aside.


Your strawberry glaze should be cooling, so now it's time to get the strawberries ready!

Purretty...


Wash, hull, and quarter the strawberries.


Pour the strawberries into the glaze and mix till all of the strawberries are coated. 


Now to assemble this dessert!

Grab your cooled crust...

and plop all of the cream cheese filling on top.

Spread the filling evenly over the crust, making sure that no crust is exposed and the edges are sealed.


Now grab your glazed strawberries. Spoon them out evenly over the surface of the filling. 

Like this! And tah-dah! You have Fresh Strawberry Dessert! Refrigerate this for at least two hours before serving.

Look at those vibrant colors! I did not enhance these colors in any way.


Perfect summer picnic dessert!


And now to cut it...


oh yeah baby.


The sweet/tart topping, paired with the tangy filling, and the crunchy nutty crust =equals= PARTY IN MY MOUTH!

Thanks for reading y'all!  Love ya!

Monday, September 12, 2011

Can't Stay Away from the Kitchen Banana Bread


I love banana bread. My mom would make it for me and my brothers when we were growing up for breakfast. I'd drag my little cotton-headed-ninny-muggins self out of my bed and follow the smell of fresh baked banana bread down to the kitchen. Momma would cut me a warm slice, place a pat of butter on top, and pour me an ice cold glass of milk. Oh memories *contented sigh*. Lucky for my mother, but unfortunate for me, she is one of those fabulous cooks that never uses a recipe. She just goes with her gut and dumps a little of this, and a little of that and it always turns out really good. BUT! She never makes the same thing the saw way twice. This is very unfortunate for me because she doesn't write down her recipes, and she doesn't ever remember how much of what she uses. Although, there are some things she makes like lima beans and sausage, or her potato salad that, for the most part, taste the same most every time. But those are cooked-- not baked. When it comes to baking you need exact measurements to make things taste right. And so, I have been searching for a while now for a banana bread recipe that tasted delicious, was moist, and prompted those warm and fuzzy feel-good memories from my childhood. 
I have found one such recipe. 
     My new friend, and fellow Indian Princess (ha!), Becca brought a dish of banana bread to Bible study last week. I had already eaten dinner but I thought, "what the hay. I'll have a piece." After I devoured my piece I immediately wanted a second. But we were in the middle of our Bible study and I didn't want to be rude, so I waited patiently till the end and then informed Becca I would be taking some of her bread "home to Adam." Yeah right. I had selfish plans for that bread. The next morning I placed the bread in the microwave until just warm, put a pat of butter on top, and gulped it down with a glass of milk. I was home. In the kitchen. With my momma. This bread was magic! I had to have the recipe. I sent Becca a message hoping she would share her recipe with me-- and she did! I'm pretty sure she is my new favorite person. 
     Not only is this bread really scrumptious, it is insanely simple to make. And I'm gonna show you how I made it!


You will need bananas, butter, an egg, flour, sugar, baking soda, salt, and vanilla. 

I can hear some of you saying, "what?! NO PECANS?!" And you know what? A few years ago I would have said the exact same thing. It just wasn't banana bread to me without pecans.

But I'll say it again; No. No pecans. You want to know why? Let me tell you a little story. There was a little old lady in my church that used to make banana bread for my family on a regular basis. This woman was like a grandmother to me. Precious woman. My brother Lance and I loved it when she brought us her homemade banana bread, wrapped in tin foil, to church. We couldn't wait to get home and have a slice. I don't know what her recipe called for, but the loafs she made were moist, sweet, and nutty from the pecans. She lived on a large piece of land that had several pecan trees. She would gather up the pecans, shell them herself, and chop them up to put in her banana bread. One Sunday when she brought us a loaf, Lance and I both cut ourselves generous slices and went to town on that bread. My dad happened to walk into the kitchen when Lance was taking a bite of the bread. His teeth crunched on something in the bread that made his jaw lock. "Uh. What was that?" he said in disgust. My dad said, "oh, it was probably just a piece of pecan shell that got left on one of the pecans." Lance started to feel a little better. Then dad said, "or-- it could have been one of her old hard fingernails that fell into the batter before she baked it and you just crunched on an old nasty fingernail." Ha! I thought Lance was going to puke. We never ate her banana bread again. We would bring it home with good intentions, but then it would just sit on the counter because no one could get what my dad said out of their heads.

So NO! NO PECANS!


Start by mashing the bananas with a fork. I didn't mash mine too fine. There were still a few chunks.

Pour the melted butter over the bananas. Mix to combine.

Then add the sugar, egg, and vanilla. Becca told me she added an entire tablespoon of vanilla-- so I did too. That was some good advice right there.


Stir to combine.


Finally dump in the baking soda, salt, and flour.

Stir until smooth.

Grease your loaf pan... or in my case two loaf pans; a larger one and a smaller one. The reason I have two loaf pans is because I made a small loaf for mine and Adam's friend Steve. You may remember him from the Peanut Butter Chocolate Cake post. He actually donated a banana from his lunch box to make this bread possible. His one condition before he gave it to me was that he get some of the bread. So here is me keeping that promise!


Pour the batter into the greased loaf pan(s).


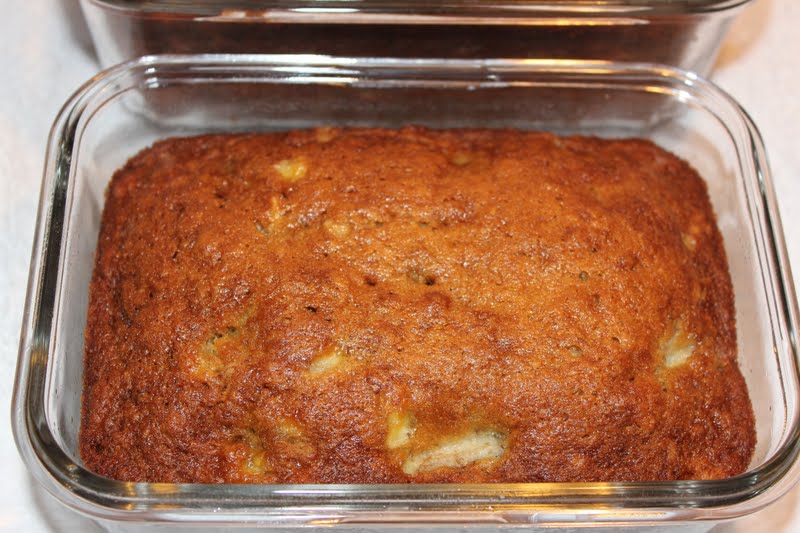
Bake until golden brown and delicious! Just like these beauties!


Mmmmmmmmmmmmmm.

For the recipe, including measurements, click here: Banana Bread Recipe.


Like most of my other posts I always like to show you how the final product looks cut/sliced/scooped what have you. Well, I have recently become obsessed with food blogs that have "style and design" pictures of the food. Here is my pitiful attempt at "style and design." I'm trying to get better! There will be more and better to come!


This is my favorite pic :)

Crispy sugary exterior, soft moist interior. Perfection!

Yes, I need that much butter on mine. It's a requirement.


Thanks for reading everybody! Love y'all!