It is a tradition for me to make my own birthday cake, and I always try to think of something I haven't made before. My favorite cake is chocolate, so it's normally a matter of what can I put in and around the chocolate to make it different and better than the year before. I originally made this cake on my 22nd birthday this year. Since I was a little girl my mom has been buying those mini frozen cheesecakes from Sam's. You know, the raspberry, new york style, and turtle cheesecake bites in maroon plaid mini muffin cups. (Well if you don't know what I'm talking about you are missing out!) I was REALLY craving those right around my birthday, and they (the turtle ones) became inspiration for this cake.
Adam's family had me a little birthday bash at his parent's house. Nothing fancy. Just family and love :) This was my second birthday to come around since Adam and I had been engaged, and we were engaged on my birthday the year before, so this was the first opportunity his family had to have me a family birthday party. Let me share a little something with you about the Richardson's. They are the nicest, most loving family you have ever met (they remind me of my family!). They will hug your neck, and invite you in anytime to have a nice little sit in the garden. They celebrate the most special of life events over dinner with the whole family gathered around the table. This birthday party of mine, was just that. Family celebrating family. And, oh my goodness, was I touched to be considered apart of the family, even though Adam and I weren't married yet. Adam's parents had always done special things for me on my birthday while we were dating, but this-- this touched my heart.
With all of that in mind I knew I needed to bake a pretty special cake-- and I think I succeeded. Adam's sister did, too. She decided to swell my ego and tell me that this was the best cake she had ever tasted, and she went ahead and put an order in for one for her birthday. I would agree that the cake was delicious, but my feelings for it were nothing compared to hers. When I went to church that Sunday I had at least three people come up to me and say, "Rachel told me about that cake you made! It sounds divine!" So when deciding to title this post, I decided it should be called "Rachel's Birthday Cake" instead of Maria's because she is the one that LOVES this cake. She is the one that made it famous. Rachel and I were texting yesterday and I mentioned I was making this cake. She texted back, "can you mail me some?" And besides, anyone that tells me something I made is the best thing they have ever eaten immediately becomes one of my favorite people. So there.
Here's what you'll need to bake this cake:
 All purpose flour, sugar, cocoa powder, baking soda, salt, milk, water, butter, oil, eggs, and vanilla. The chocolate cake recipe I use is from Woman's Day. For a full list of ingredients with measurements click here: The Very Best Chocolate Cake Recipe. And believe me, it really is the very best chocolate cake. Preheat the oven to 350 degrees. |
Place flour and sugar in a large mixing bowl.
Sift cocoa into flour and sugar.
Add baking soda and salt
Whisk to combine... it is very hard trying to whisk with my left hand and take a picture with my right. Just saying.
Place eggs, water, milk, and melted butter in a measuring cup.
Stir with a fork to break down eggs
Pour those liquids into the flour mixture. Whisk to combine.
Next I poured in the oil.
And then the vanilla. I NEVER measure vanilla. The Lord knows how much it needs. His will be done Amen? Amen.*.
*No mother, I'm not being sacrilegious. It's just a joke.
Whisk again!
Set the batter aside and cut parchment circles to cover the bottom of two 9-inch round pans.
Look at my poor little ol' beat up pan. It's seen better days.
Before adding the parchment, lightly spray the bottom of your pan with non-stick spray.
Add the parchment, and then spray the entire pan. Repeat for the other pan.
Divide the batter between the two pans. I just pour it, eye-ball it, pour it, eye-ball it. But you can use a measuring cup to divide it if you like. I'm just type B personality, that's all. Nursing school changed that about me for a while, but now I'm back! Wow that feels good!
Now you see this "empty" bowl here. I'm supposed to tell you that because there were eggs in this batter you should never, under any circumstances put this stuff in your mouth. That's what I'm supposed to tell you. Let's just say after I got done with this bowl it looked like it had been through the dishwasher.
Take these babies and place them in your preheated oven for 30 minutes.
 Waiting is so hard. But the smell... ! Someone should make "Baking Chocolate Cake" into a candle scent.
Test the center with a toothpick. When the toothpick comes out clean it's done. Let them cool in the pans for ten minutes.
Run a knife around the edges to loosen it. And now I will demonstrate for you how I successfully remove cake from it's pan.
Cover cake with a piece of parchment.
Put a large plate over that.
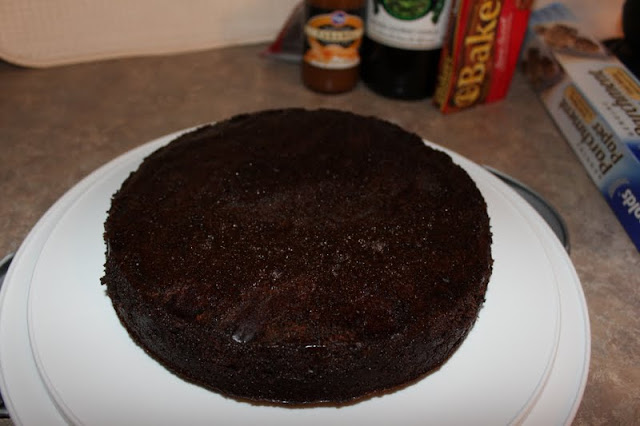
Lift the pan to reveal one delicious, and beautiful chocolate cake. I tell you, nothing makes me more mad than to have spent all that time on a cake that sticks to the pan. "Whoo! That make me mad girl."-Madea
Pull off the parchment circle-- don't throw this away!
This cake is so moist and soft that I leave the cakes on these plates for a little while. Because in my crazy mind I think it helps the cake hold together. I have no proof of that. Except that this cake held together. So there's your proof. I think it has something to do with these plates specifically. They are more like really flat bowls, and the sides of the plate seem to cradle the cake. Anyways, you do it how you want.
After the cakes are cool on the outside but still warm on the inside, I flip them over again, return the little circles of parchment to the bottom, and let them cool on a wire rack. Now you can go about your business, take a nap, try to get a job, paint your fingernails... these cakes must be completely cooled before you put a lick of icing on there. You'll be sorry if you don't! If I'm in a hurry I put a fan in front of them and turn it on high. Works like a charm!
Now, you'll notice I left these on the counter to cool. In my house this is a very dangerous spot to leave ANY food. You see, my sweet Rammer. My child. My love. He has a very bad habit of eating things off the counter. He's been caught with his hand in the cookie jar more than once.
Look! I told you!
No matter what I do he just won't stop!
Licking his lips... that little mongrel!
Moving right along.
Now for the cream cheese icing! Yum! Here is what you'll need:
Cream cheese, butter, powdered sugar, and vanilla.
For measurements click here: Cream Cheese Icing. I double this recipe for this layer cake, and I don't use quite that much powdered sugar. Hey! It's my cake and I can do that if I want!
Allow the butter and cream cheese to soften at room temperature.
Once soft, beat with an electric hand mixer until smooth. Don't forget to add the vanilla!
Whip until smooth and silky. Yes. You need to taste it.
Grab your cake plate, or whatever you choose to serve your cake on (preferably something that has a cover), and drop a dollop of icing right in the center.
 spread it around a bit. Now the next step is very important. Take a teaspoon of icing and put it on your tongue. Savor it. Next!
Place the ugliest cake round onto your dish, top side down. You want the flat side facing up. Now you say to yourself. These are beautiful sister/twin/identical cakes. They are both beautiful. And you are right-- they are. But deep down you know one turned out better than the other. Face the facts, and put the uglier one on the bottom.
Then place the prettier cake round on the top, top side facing up, flat side facing down.
Load lots of the icing on top
Using an offset spatula, spread the icing over the top of the cake
Once you've spread it to the edges, start working the icing down the sides of the cake.
Add more icing around the edges if needed. Mine needed.
Look at that silky goodness covering up that devilishly chocolate goodness!
When all the cake is covered, start smoothing the icing with your spatula to make a pretty cake. I mean, it doesn't have to be pretty. I'd still eat it ugly.
It should look like this!
Cover the cake and put it in the refrigerator to set for about 30 minutes.
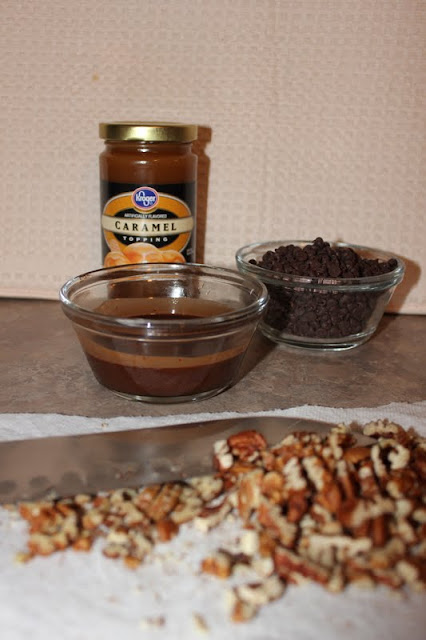
Gather your other ingredients for the topping. You'll need caramel sauce, chocolate sauce, mini chocolate chips, and chopped pecans. And you thought this cake couldn't get any better. WRONG!
Retrieve the cake from the refrigerator and sprinkle with chocolate chips.
Now the pecans.
And then lovingly drizzle this baby with caramel and chocolate sauce.
Then sprinkle with more chocolate chips and pecans
Whah-lah! Turtle Cake!
I wish I could have cut it, placed the delicate piece on my new china, poured a glass of milk, and shown you how to properly devour this cake. Unfortunately, this cake was made for some very important people at Adam's medical school. Therefore, I felt I should probably deliver the cake without having served myself a piece. You see, I can show some restraint. Just know that I dropped this cake off at Adam's school at 3:30pm, and when he went by the office at 4:00pm they had already eaten a quarter of it. You must make this cake-- not for anyone else, but for you.
Love y'all!
Go view and rate this recipe of mine on TastyKitchen.com by clicking here: Turtle Cake
Whether you have made this cake or have tasted it, please go rate it! That would mean a lot to me! Thanks friends!


You have always been an amazing cook! You make it look so good. Sure wish I could pull up a chair and eat a piece with you. I love you
ReplyDeleteWhoa, Maria, this looks amazing and your photos are outstanding (of course the dog licking is my favorite)! I am your 2nd cousin by marriage. Adam's dad, Steve, is my 1st cousin. (I am Uncle Roy's daughter). Anyway, I love to cook too and enjoy reading blogs on cooking, but enjoy eating new things even more. This is going to the top of the list!! Thanks for sharing.
ReplyDeleteOh by the way, Im a nurse too!
ReplyDeleteThanks mom! I wish you could too!
ReplyDeleteHi mrs. Grady-- or should I say cousin! Thanks for "introducing" yourself ;) what is your first name?